In this post, I will be showing you how to create a content locker on OGAds…
… to make you the most money and increase your conversion rate.
You will then be able to add your content locker to your CPA Landing pages to start earning.
But first, let’s explain what is a content locker. 🤳🔒
What is a Content Locker
A content locker is a wall or a pop-up that separates a user from premium content that they would like to access. In order to access the premium content, the user has to complete offers from the content locker.
Premium content can consist of eBooks, Games, Premium Apps, In-Game Currency, Giveaway, and anything else that can be considered premium.
This is what a Content Locker from OGAds looks like.
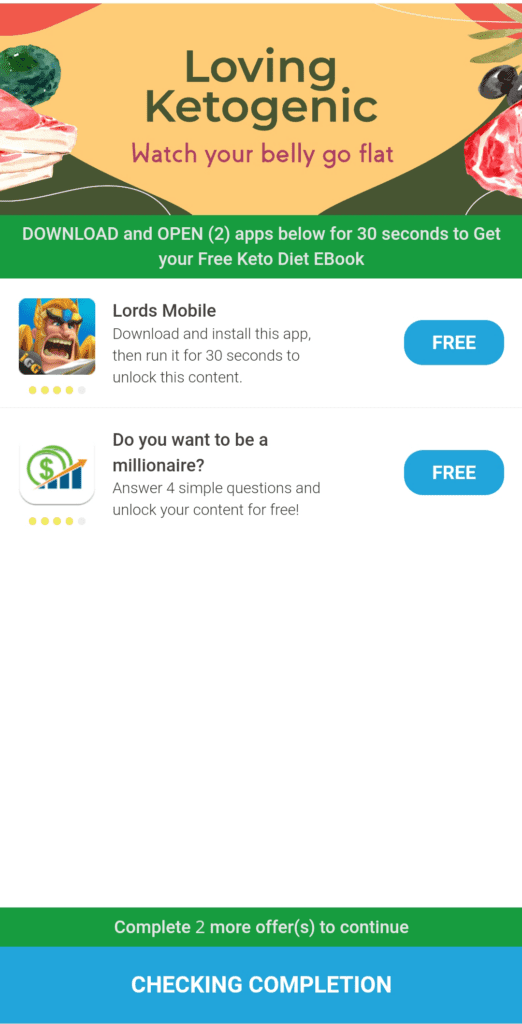
Now behind this content Locker is an eBook about Keto Diet.
So this is an example of locking premium content using a content locker. Once users complete these offers, then they will gain access to the premium content which in this case is an eBook.
Setting up Your Content Locker
Now if you already have an OGAds account then you are ready to go. If you don’t have an account as yet, then go ahead and Sign Up.

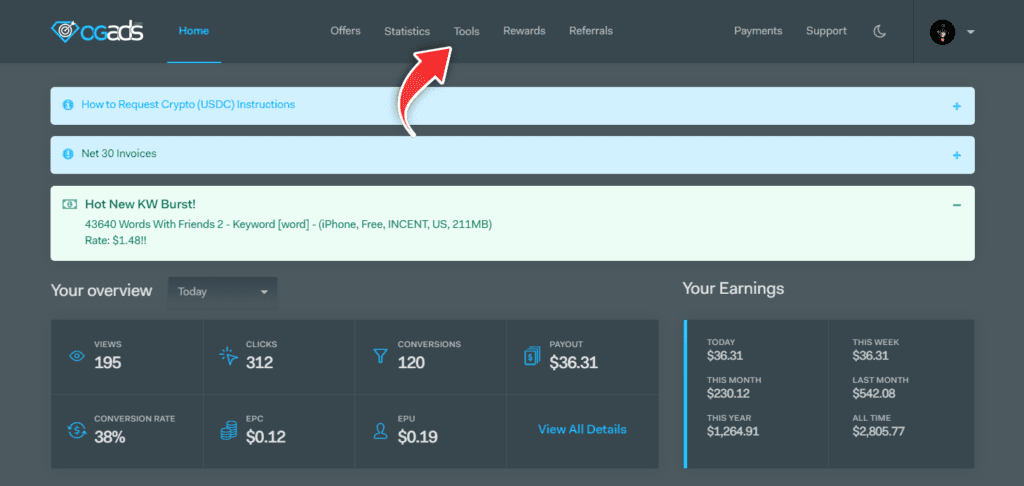
After signing in or signing up to OGAds, you will now be on your dashboard.
So, you want to go to Tools…
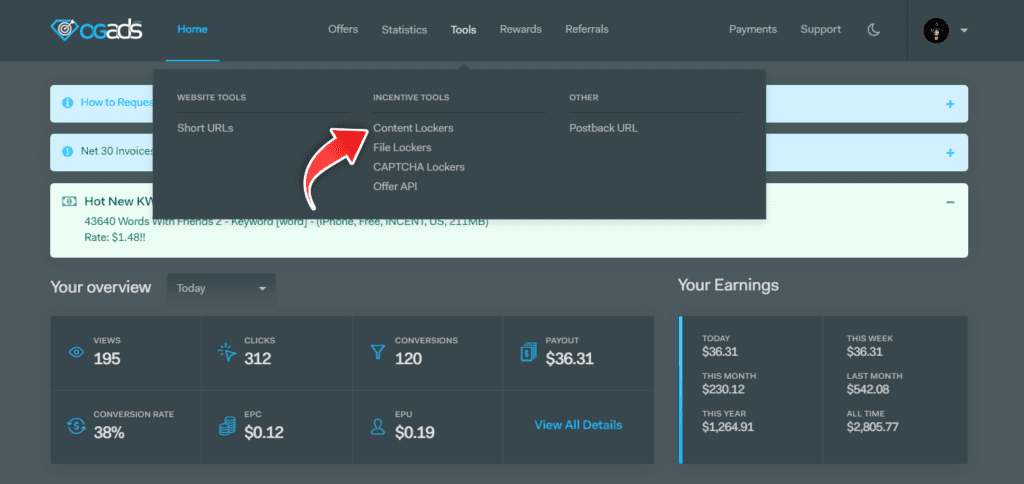
Then you want to click on Content Lockers, so you can get to the page to create your locker.
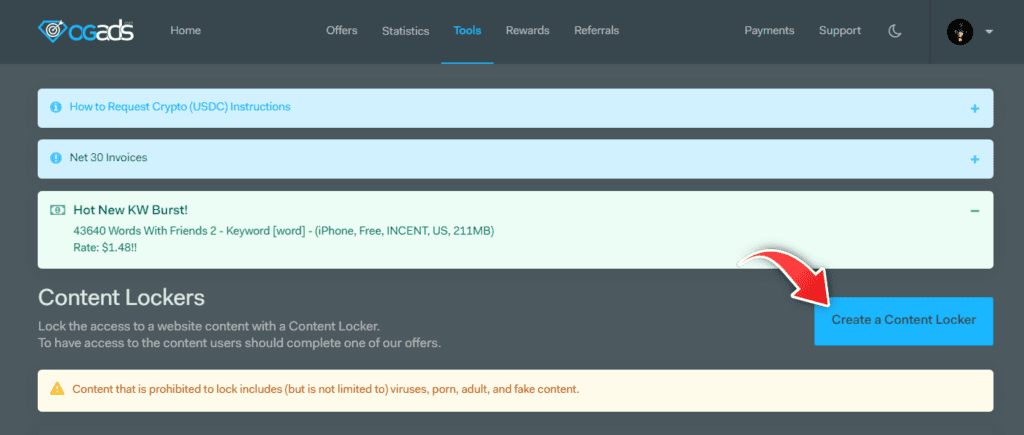
You will then be brought to the Content Lockers page, now you want to click on Create a Content Locker.
Now that you click on create a content locker, you will be greeted with the User Interface that will be used to design your content locker.
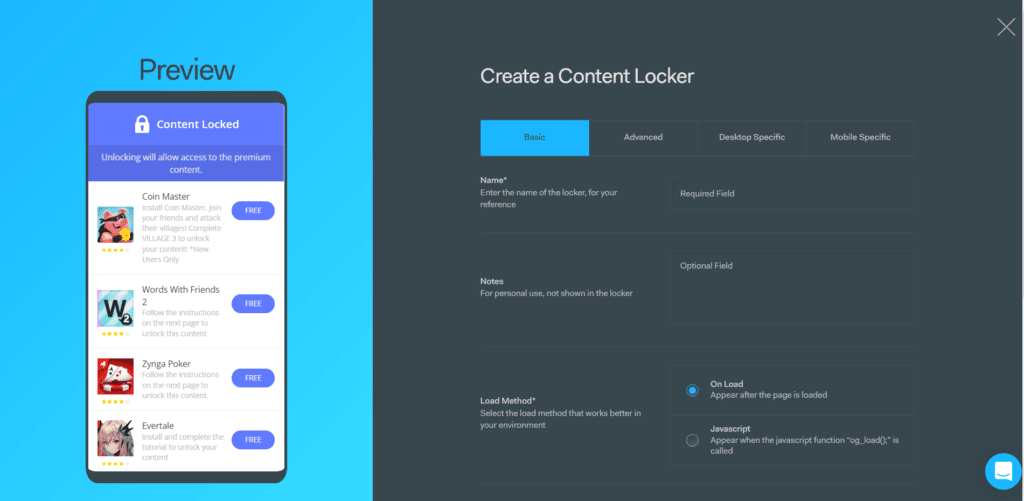
On the left side, you can see a preview of what your content locker will look like as you are designing it.
While on the right side, is where you are able to design and optimize your locker.
Basic Content Locker Settings
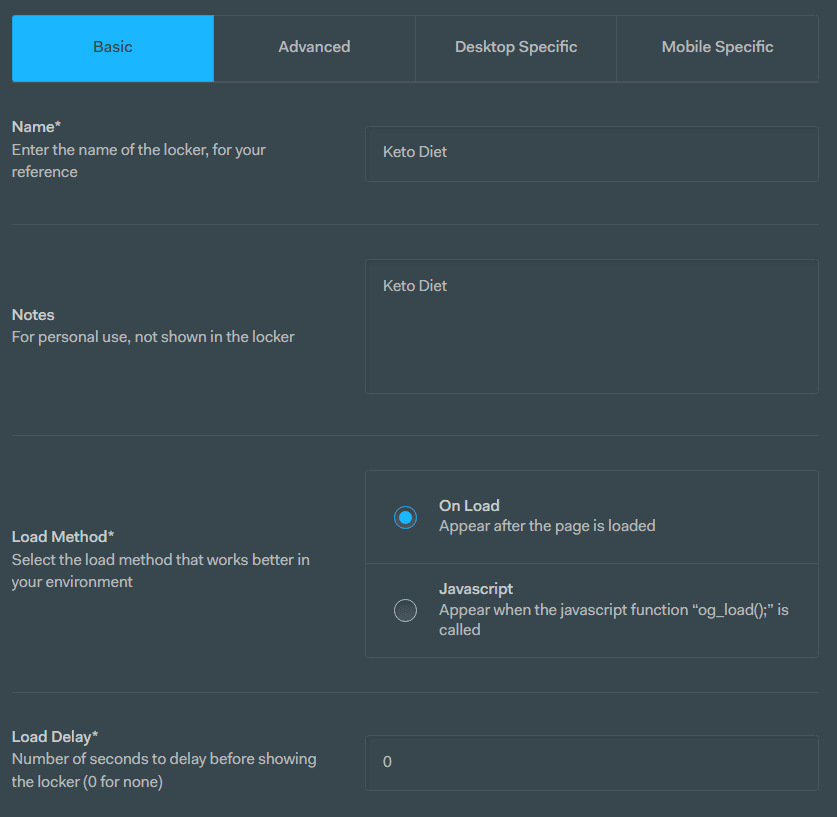
This is the basic side of designing your content locker, where you will enter the name of your specific content locker, as this allows you to identify how that content locker is performing.
For the personal notes, you can choose if you want to enter something here or you can leave it empty.
Leave the load method to On Load as you will not be using the Javascript function to set up this content locker.
Your load delay can also be left on 0
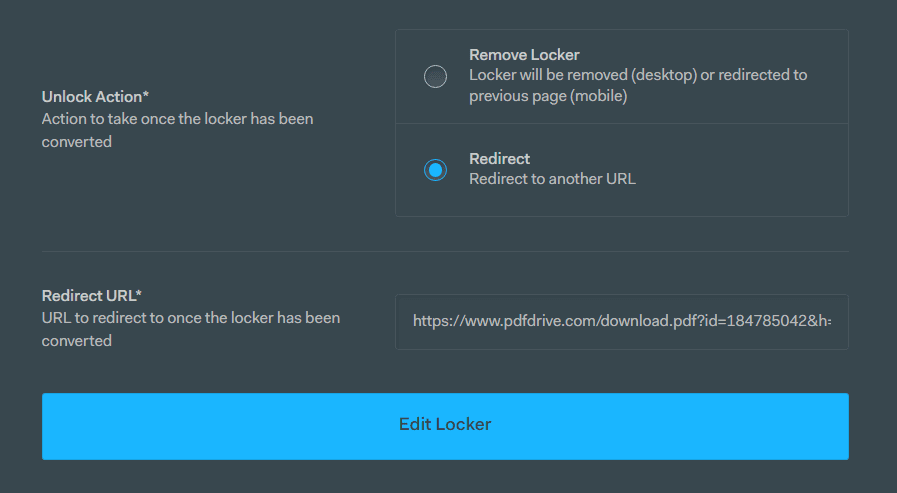
For Unlock Action, this is where you want to send the users after they complete your content locker.
Once you are finished editing the Basics of your content locker, you want to move on to the Advanced section.
Advanced Content Locker Settings
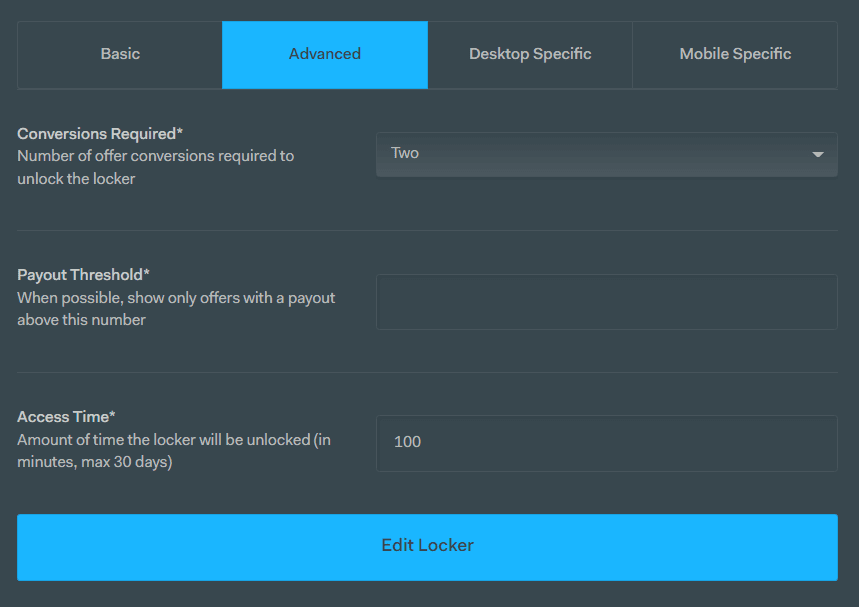
The conversion required is where you will set the number of offers a user needs to complete in order to unlock the premium content.
Usually, you want to set this to two, this way it doesn’t take a user too long to unlock the content locker.
Your Payment threshold is where you will set what offers to show on your content locker based on the payout. You want to leave this empty to allow all offers.
Then there is the Access Time; you want to set this at 100 or more mins. If you set this too low, users will open the locker without completing the offers when you set it, and you will not be paid for the conversions.
Once you are finished with the Advanced Settings, you want to move on to Desktop specific
Desktop Specific
Most of your Desktop Specific will have some default settings; you can leave most of your settings on default. The Desktop version of the locker isn’t used as much as the mobile-specific.
You can choose to customize your desktop theme with code but it is not necessary.
I do have some custom code on my locker.
I wouldn’t recommend it if you don’t understand much about code but…
… for those who are interested in that, here is that code.
@import url('https://fonts.googleapis.com/css?family=Roboto:300,500,700');

body {
  background: url(https://i.imgur.com/gX5Pow4.jpg) no-repeat fixed center/cover;
  font-family: 'Roboto', sans-serif !important;
  font-weight: 300 !important;
}

.lockerPopup .header {
  color: #000000 !important;
  padding-left: 0.5rem;
  padding-right: 0.5rem;
  font-family: 'Roboto', sans-serif !important;
  font-weight: 700 !important;
  letter-spacing: 1px !important;
  text-transform: uppercase !important;
  font-size: 1.8rem !important;
  display: flex;
  justify-content: center;
  align-items: center;
}

.lockerPopup .header, .lc-checks li {
  background-color: #3B8561 !important;
}

.sk-folding-cube .sk-cube:before {
  background-color: #6F3B85 !important;
}

.lc-checks li {
  font-size: 1.1rem !important;
}

.lockerPopup {
  border-color: #38b6e1 !important;
}

.lockerPopup .header img {
  height: 72px !Important;
  margin-right: 0.25rem !important;
}

.lockerPopup .content, .lockerPopup .footer {
  font-family: 'Roboto', sans-serif !important;
  font-weight: 300 !important;
  color: #000000 !important;
}

.lockerPopup {
  background-color: white !important;
}

.lockerPopup .footer {
  text-transform: uppercase;
  font-weight: 700 !important;
}

.lc-checks li {
  border-radius: 5px !important;
}
Now that you are finished with your Desktop specific settings, you can move on to your Mobile Specific settings.
Mobile Specific
So, these are the settings that you can use on your mobile content locker.
The mobile content locker is what most of your users will see, as mobile still dominates in traffic.
I also used some custom code on my mobile content locker, so for those interested in that, you can find the code I used below.
So, if you understand code then you can go ahead and make changes to the code to fit your liking.
@import url('https://fonts.googleapis.com/css?family=Roboto:300,500,700');
body {
font-family: 'Roboto', sans-serif !important;
font-weight: 300 !important;
}
.header {
background-size: cover !important;
background-position: center !important;
font-family: 'Roboto', sans-serif !important;
font-size: 1.5rem !important;
text-transform: uppercase !important;
min-height: 16.667rem !important;
}
.header h3 {
display: none;
}
.header img {
display: none;
}
.sub-header p, .sub-footer p {
color: #FFFFFF !important;
background-color: #1aaf47 !important;
padding: 0.5rem !important;
font-family: 'Roboto', sans-serif;
font-weight: 500 !important;
font-size: 1.4rem !important;
}
.app .img-content .star {
background-color: #f0ed63;
}
.footer img {
display: none;
}
.footer, .app .app-btn {
background-color: #223bda !important;
text-transform: uppercase !important;
font-weight: 500 !important;
font-family: 'Roboto', sans-serif !important;
}
.app .text-content .title, .app .app-btn {
font-weight: 500 !important;
font-family: 'Roboto', sans-serif !important;
}
.app .app-btn {
font-weight: 700 !important;
font-size: 1.5rem !important;
}
.app .text-content .desc {
font-weight: 300 !important;
font-family: 'Roboto', sans-serif !important;
color: #333 !important;
}
hr:last-child {
display: none;
}
.app .img-content .empty {
background-color: #eee;
}
h3, h2, .app .app-btn {
color: #FFFFFF !important;
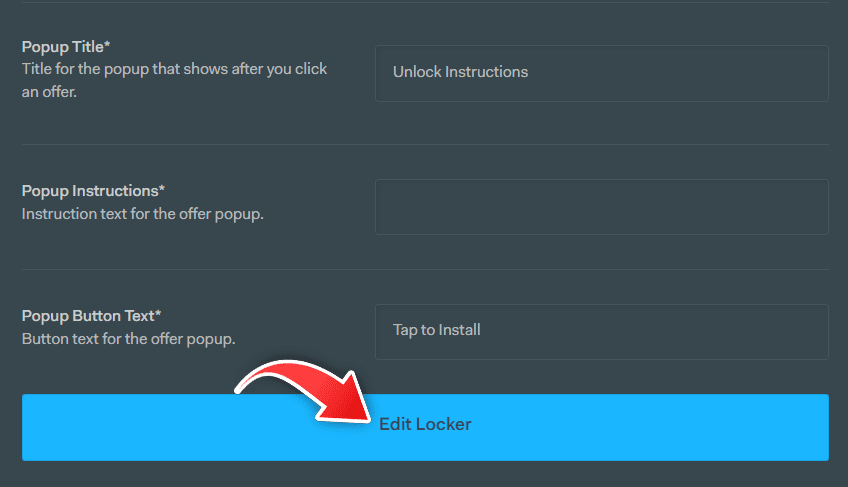
}Saving your Content Locker
Now that you have finished editing the settings on your Content Locker, you can click on Edit Locker.
You will then save your content locker settings for it to be used.
Now that your content locker is completed, you can get a free CPA Marketing Landing page to add your content locker too.
Using the different free traffic sources, you can start promoting your content locker through your CPA Landing page.
